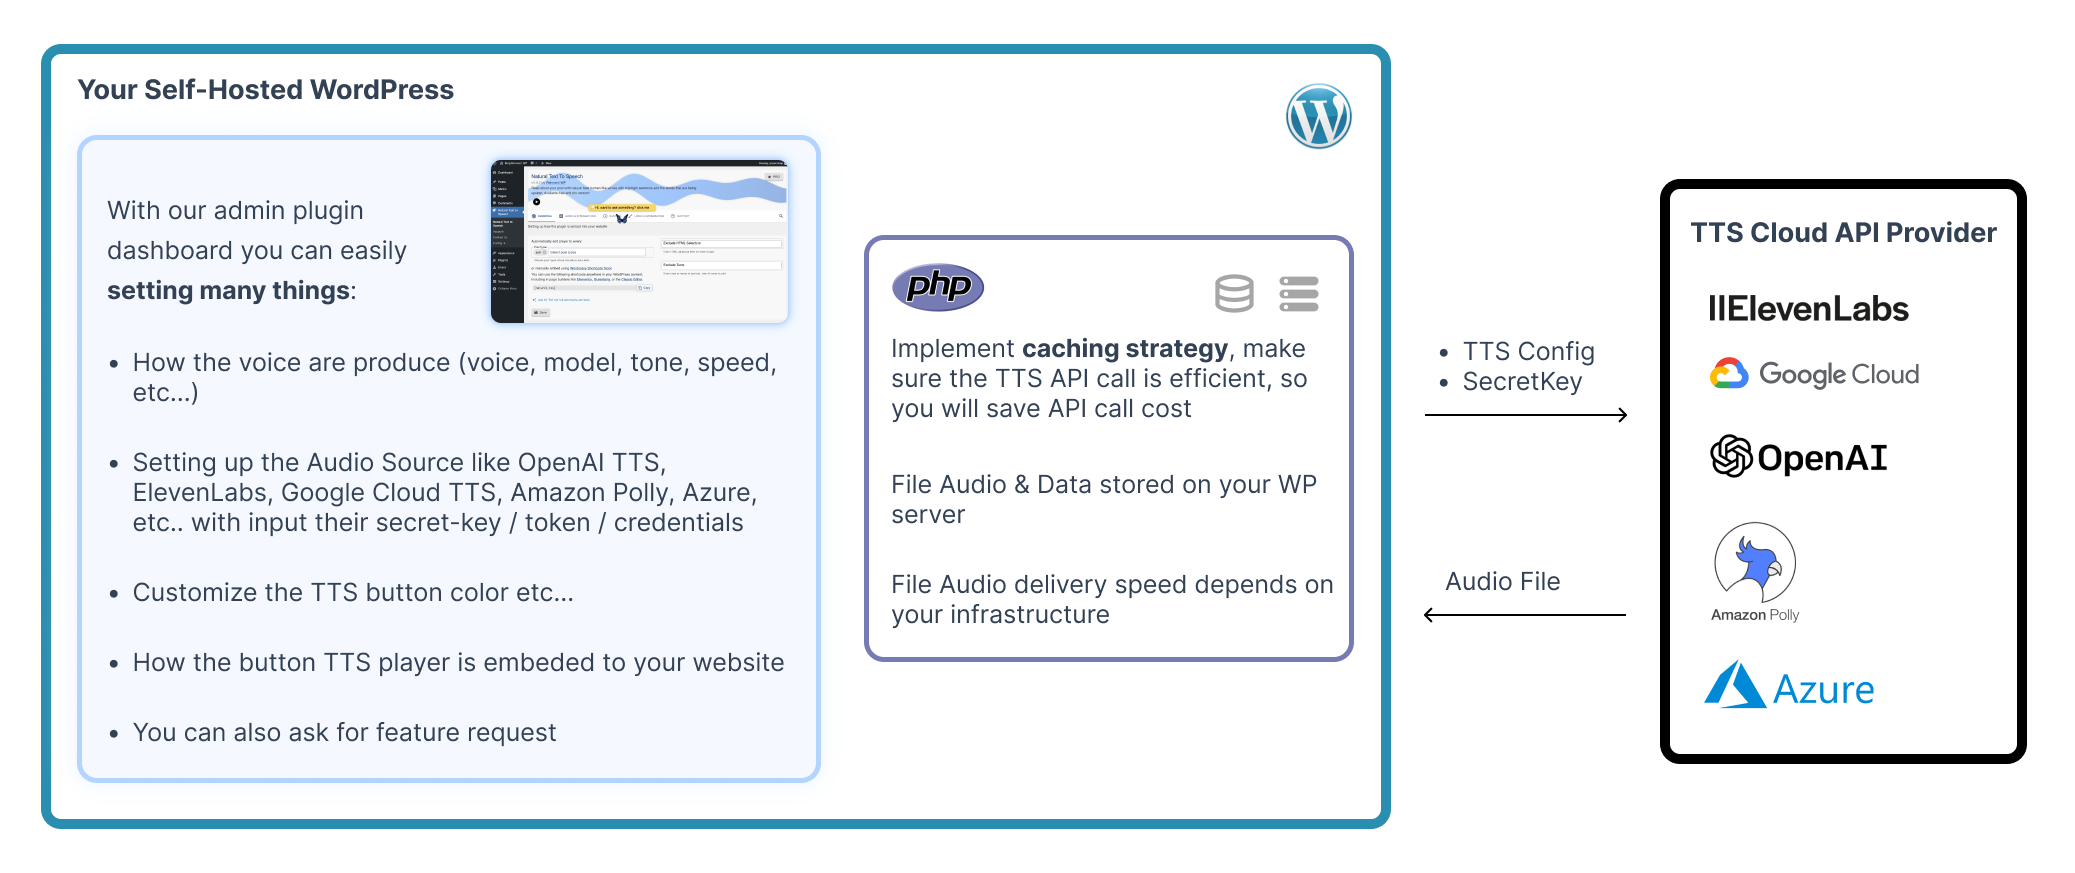
Do you want your WordPress site to speak to your audience with lifelike, natural voices? By integrating Microsoft Azure Cognitive Services Text-to-Speech with the Reinvent WP Text to Speech plugin, you can convert blog posts, pages, and even educational content into high-quality audio narration.
This setup improves accessibility, increases user engagement, and gives your audience the option to listen rather than read.
Why Use Azure Text to Speech?
Microsoft Azure Cognitive Services offers some of the most advanced speech synthesis technology available today.
Benefits of using Azure TTS:
- Neural voices with natural tone and expressive intonation.
- Support for 100+ languages and dialects.
- Custom voice creation for brand-specific voiceovers.
- SSML (Speech Synthesis Markup Language) to control pauses, pronunciation, and emphasis.
- Fast, reliable performance powered by Microsoft’s global cloud infrastructure.
Perfect for accessibility compliance, e-learning, podcasts, and multilingual websites.
About Reinvent WP Text to Speech Plugin
The Reinvent WP Text to Speech plugin makes it simple to add TTS to WordPress without coding.
Key Features:
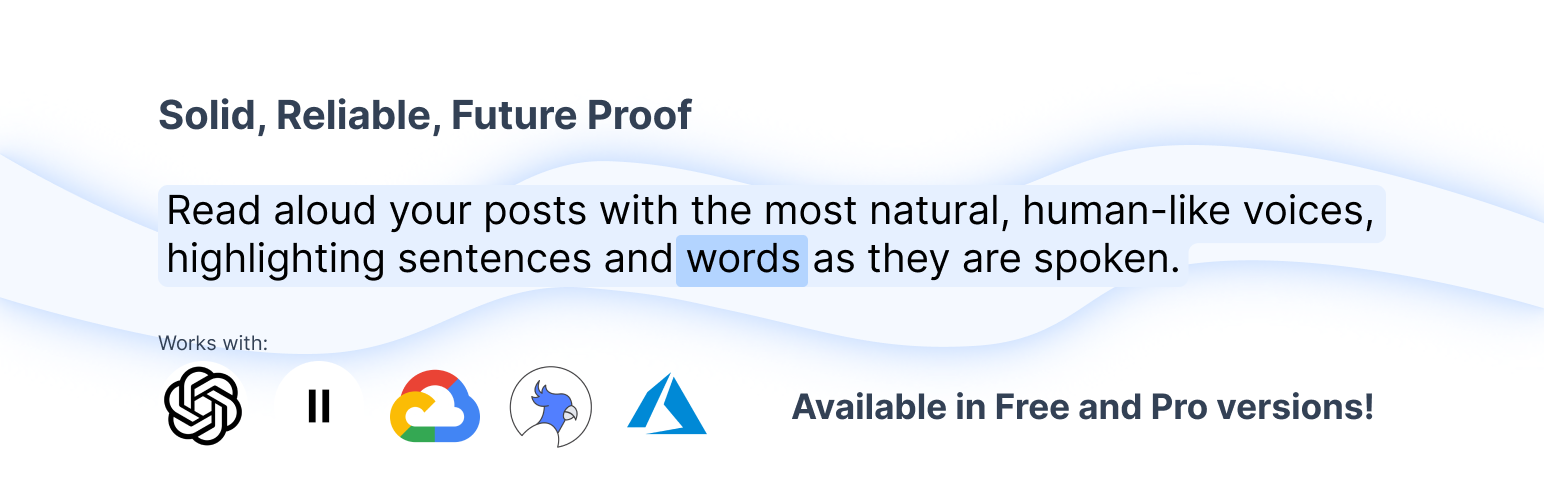
- Dynamic highlighting of sentences and words as content is read aloud.
- A “Listen” button for readers to play audio directly on your site.
- Integrates with top TTS providers, including Azure, Google Cloud TTS, Amazon Polly, ElevenLabs, and OpenAI.
- Multi-language support, ideal for global audiences.
- Flexible placement via shortcodes
Step-by-Step Setup Guide: Azure AI Speech + WordPress
Follow these steps to connect Microsoft Azure TTS to your WordPress site.
Step 1: Install & Activate the Plugin
- In your WordPress Dashboard, go to Plugins → Add New.
- Search for Reinvent WP Text to Speech.
- Click Install, then Activate.
Step 2: Upgrade to Pro
Azure integration is available in the Pro version of the plugin.
Upgrade to unlock external TTS providers.
Step 3: Create an Azure Account
If you don’t already have an Azure account:
- Go to Microsoft Azure.
- Sign up for a free account or log in.
- Verify your email and set up billing information (you get free credits initially).
Step 4: Create Subscriptions
Click the subscription button or search it or goto this page
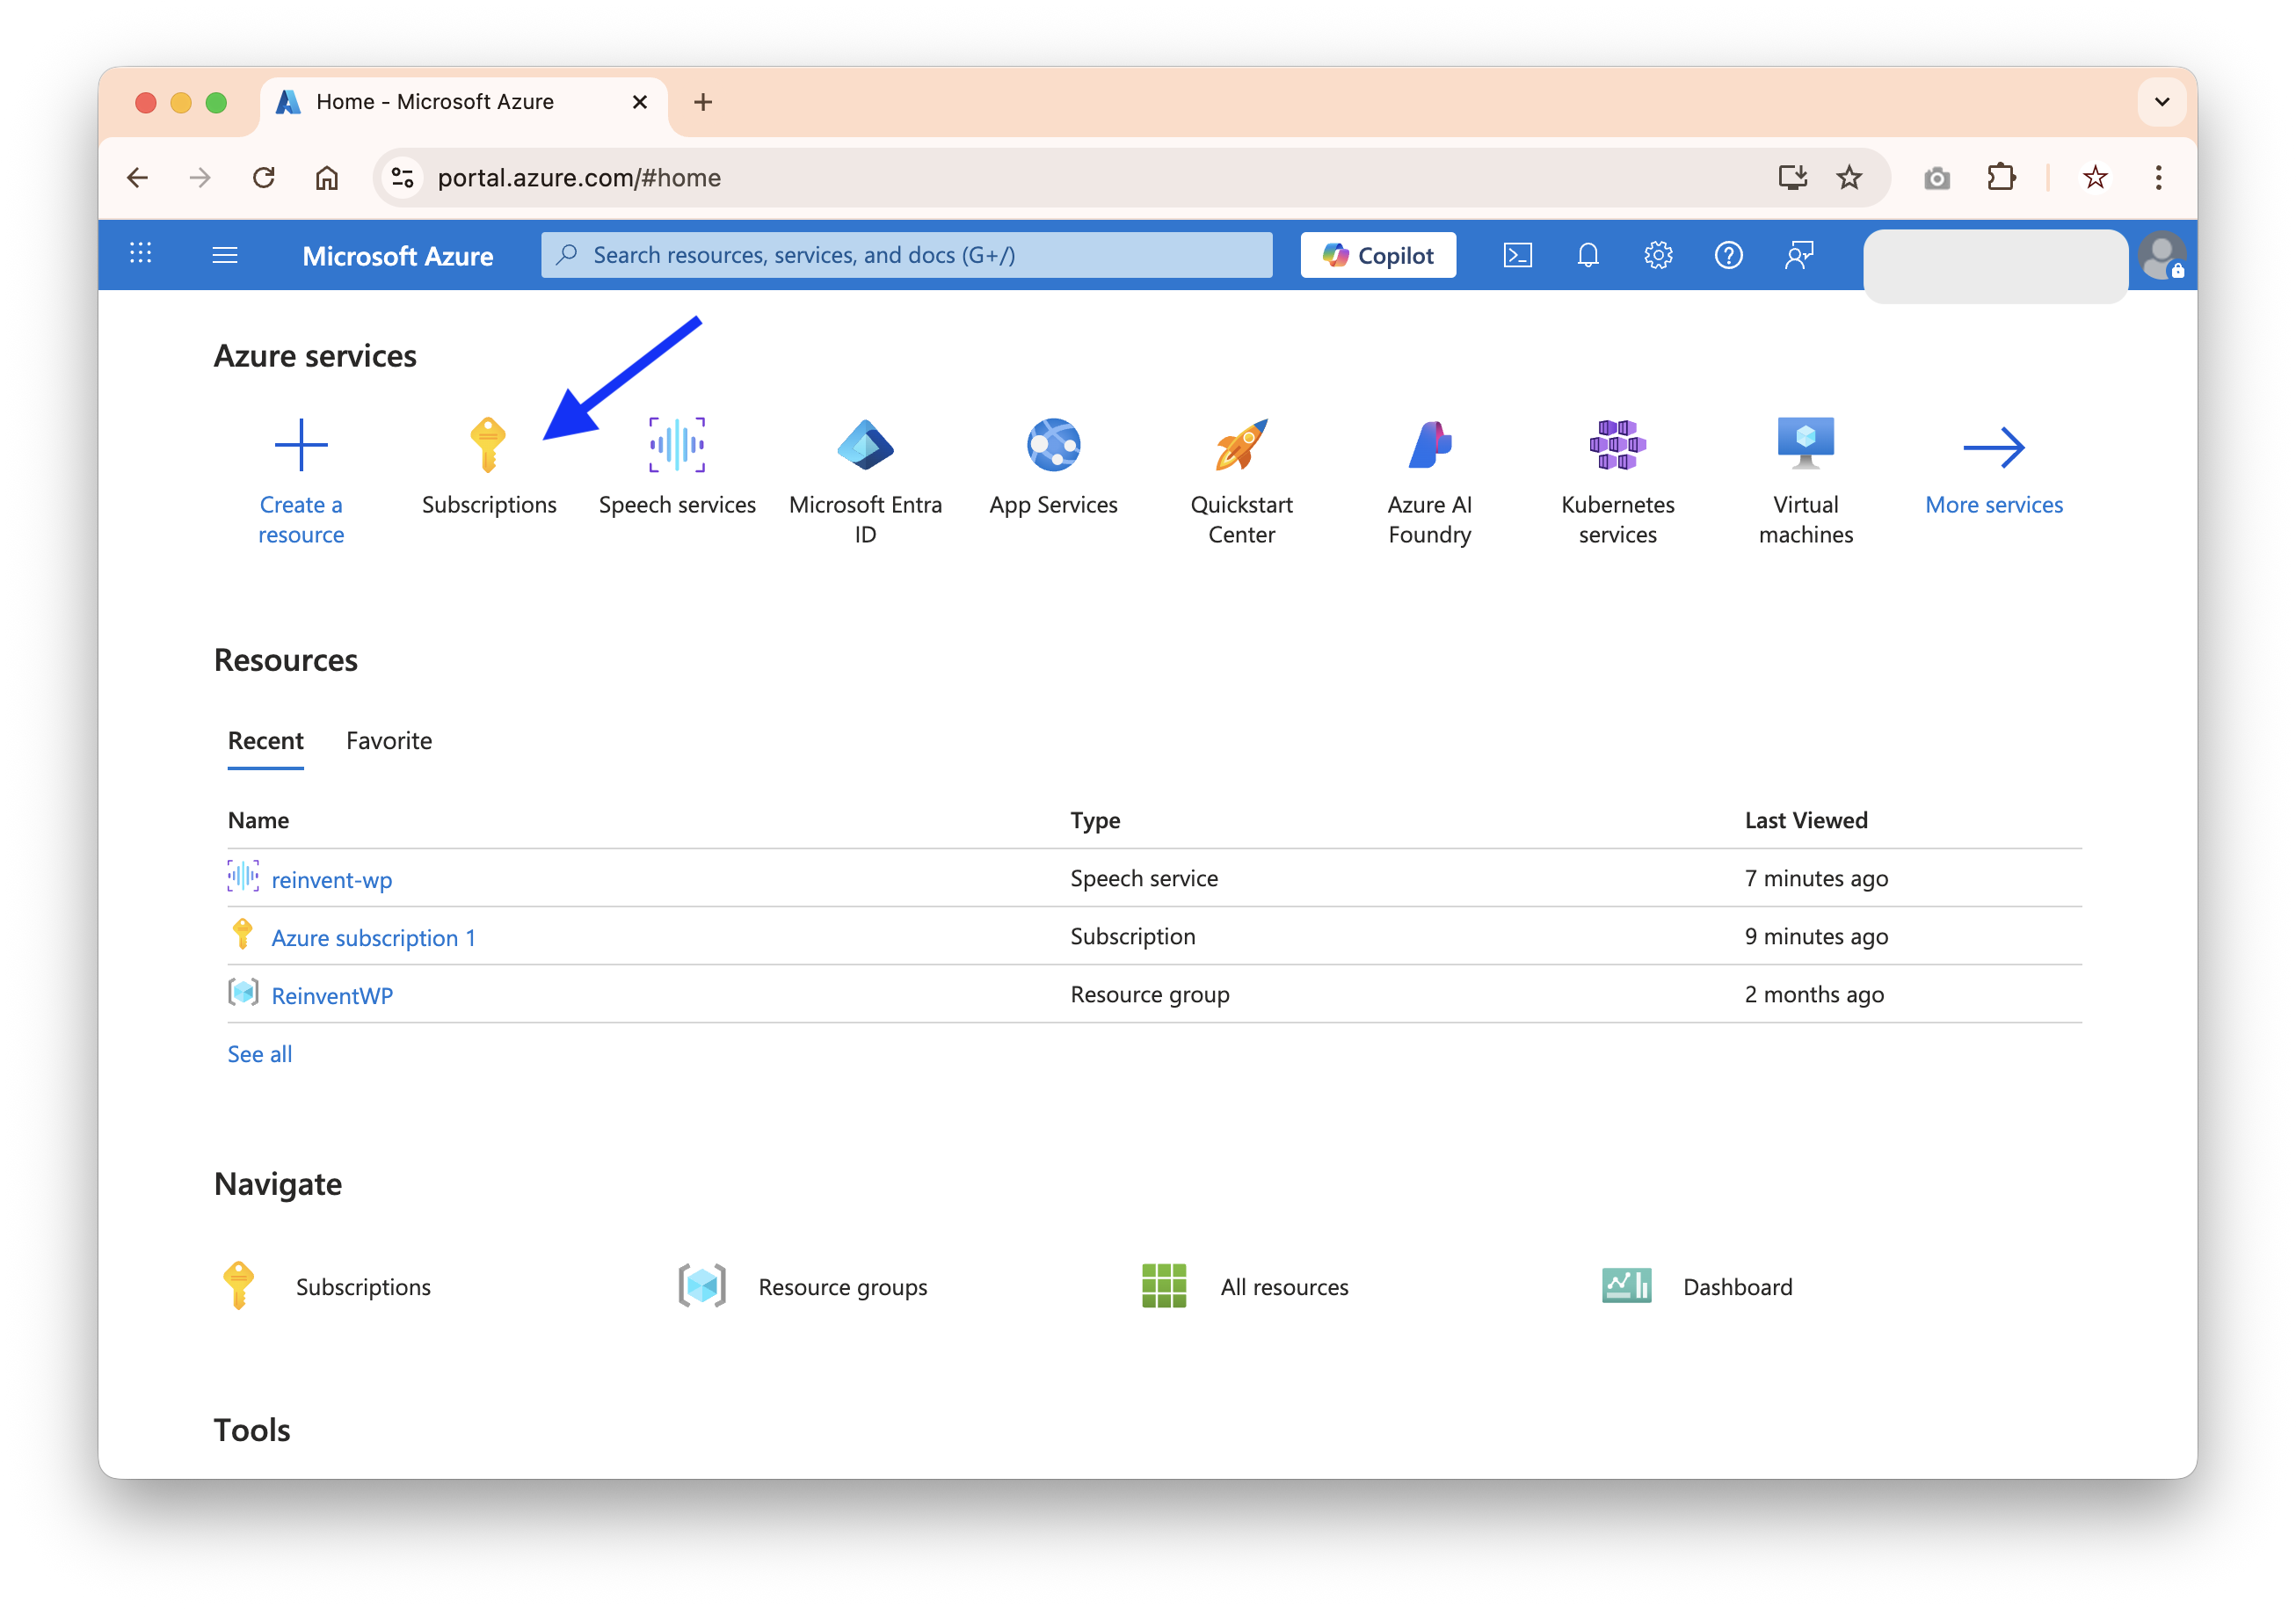
Here the Create a Subscription Page
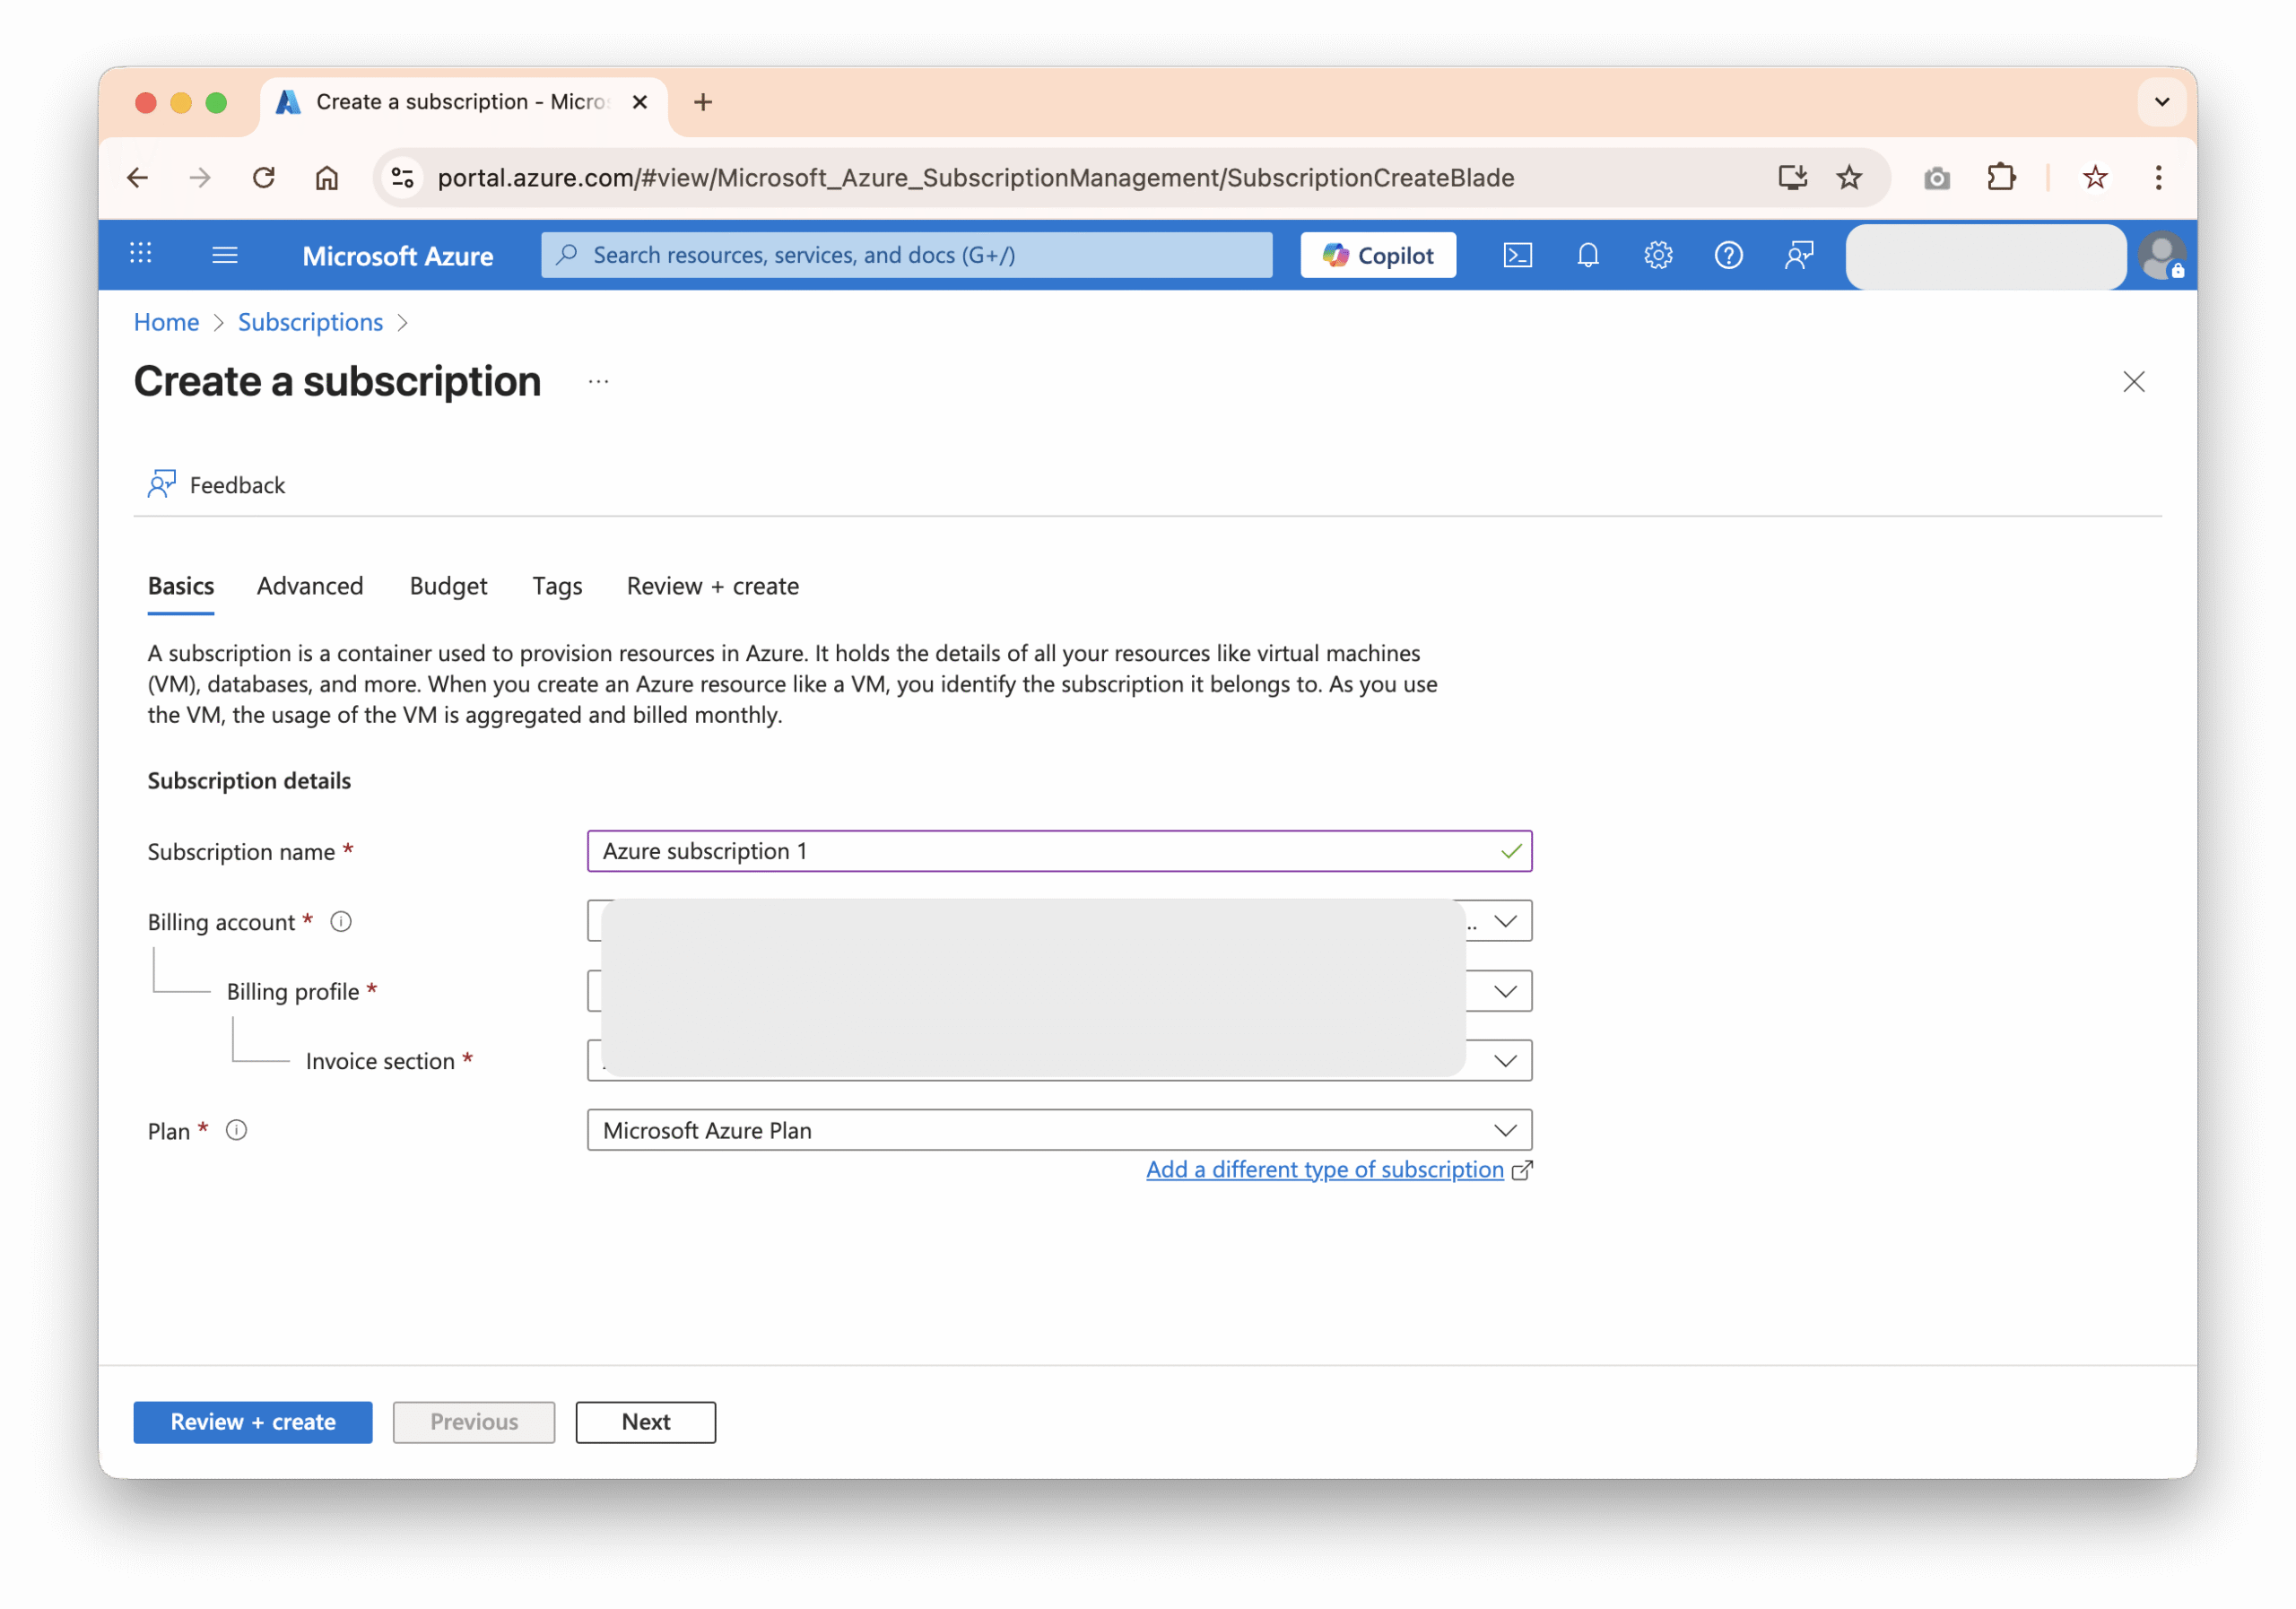
- Enter Subscription name
- Billing account
- Billing Profile
- Invoice Section
Later this subscription is needed when creating the Speech Resource
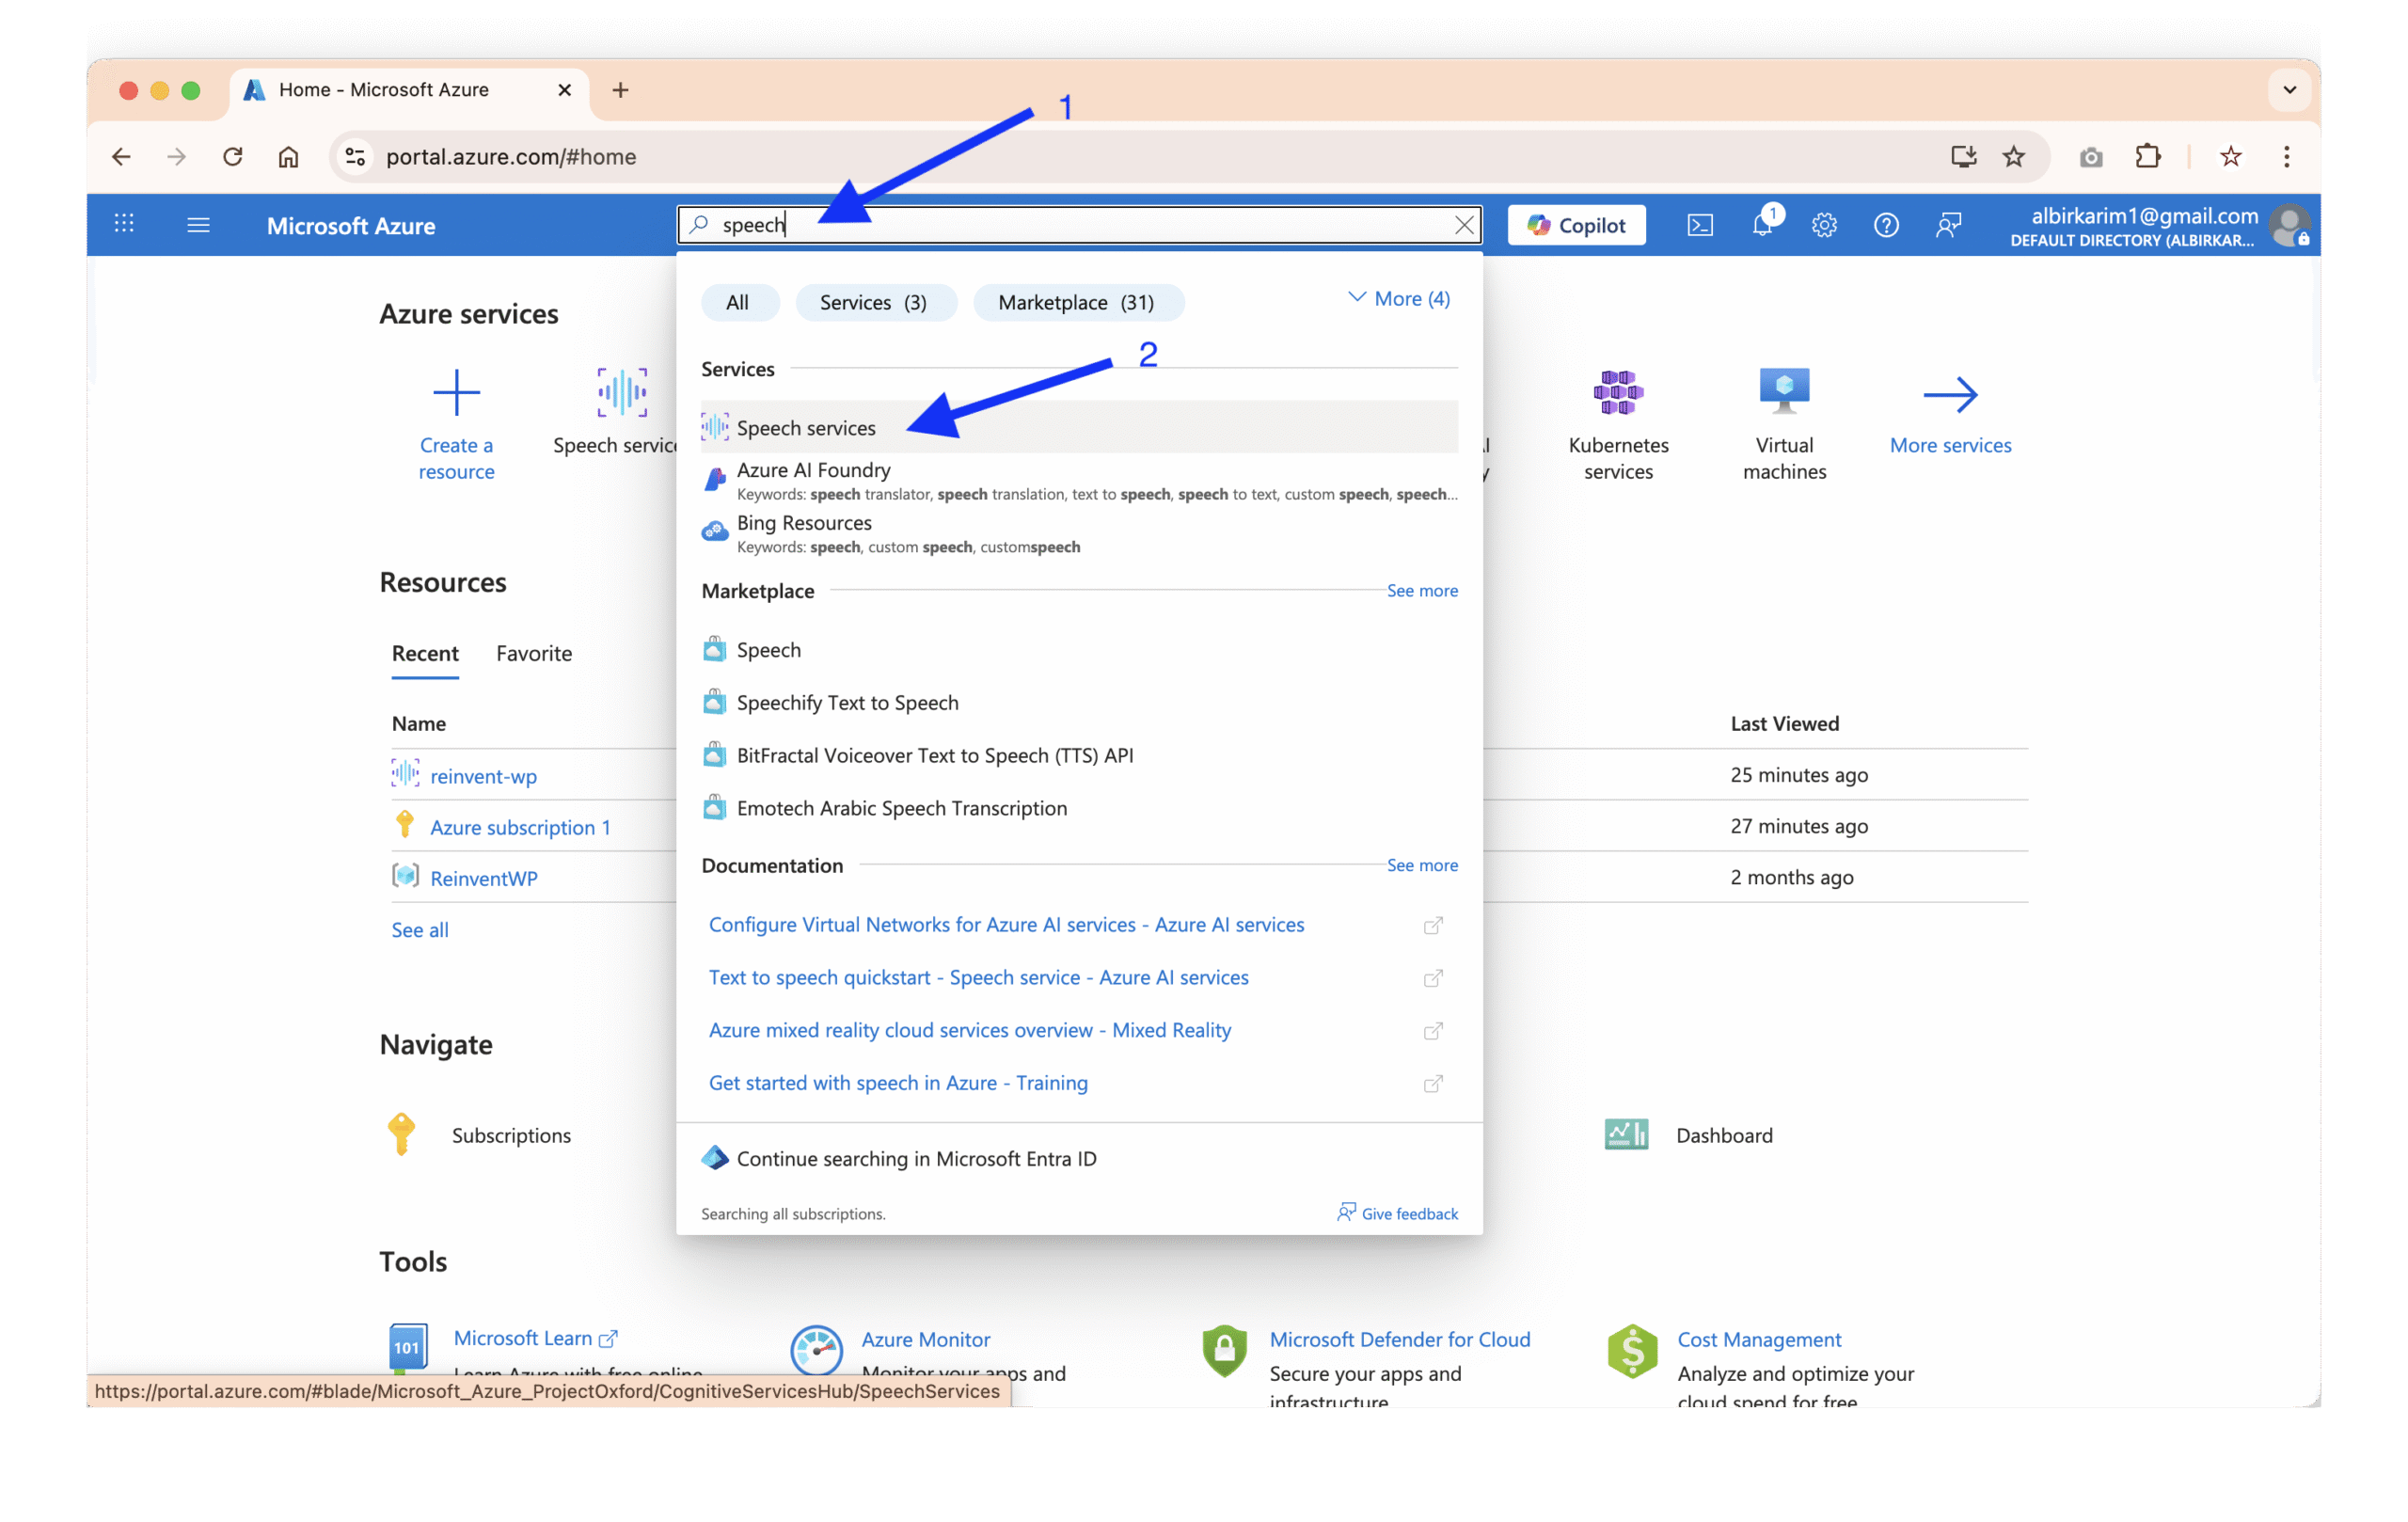
Step 4: Create a Speech Resource in Azure
To use Azure’s Text-to-Speech service:
1. Go to the Azure Portal → Create a Resource.
2. Search for Speech and click Create.
3. Fill in the required details:
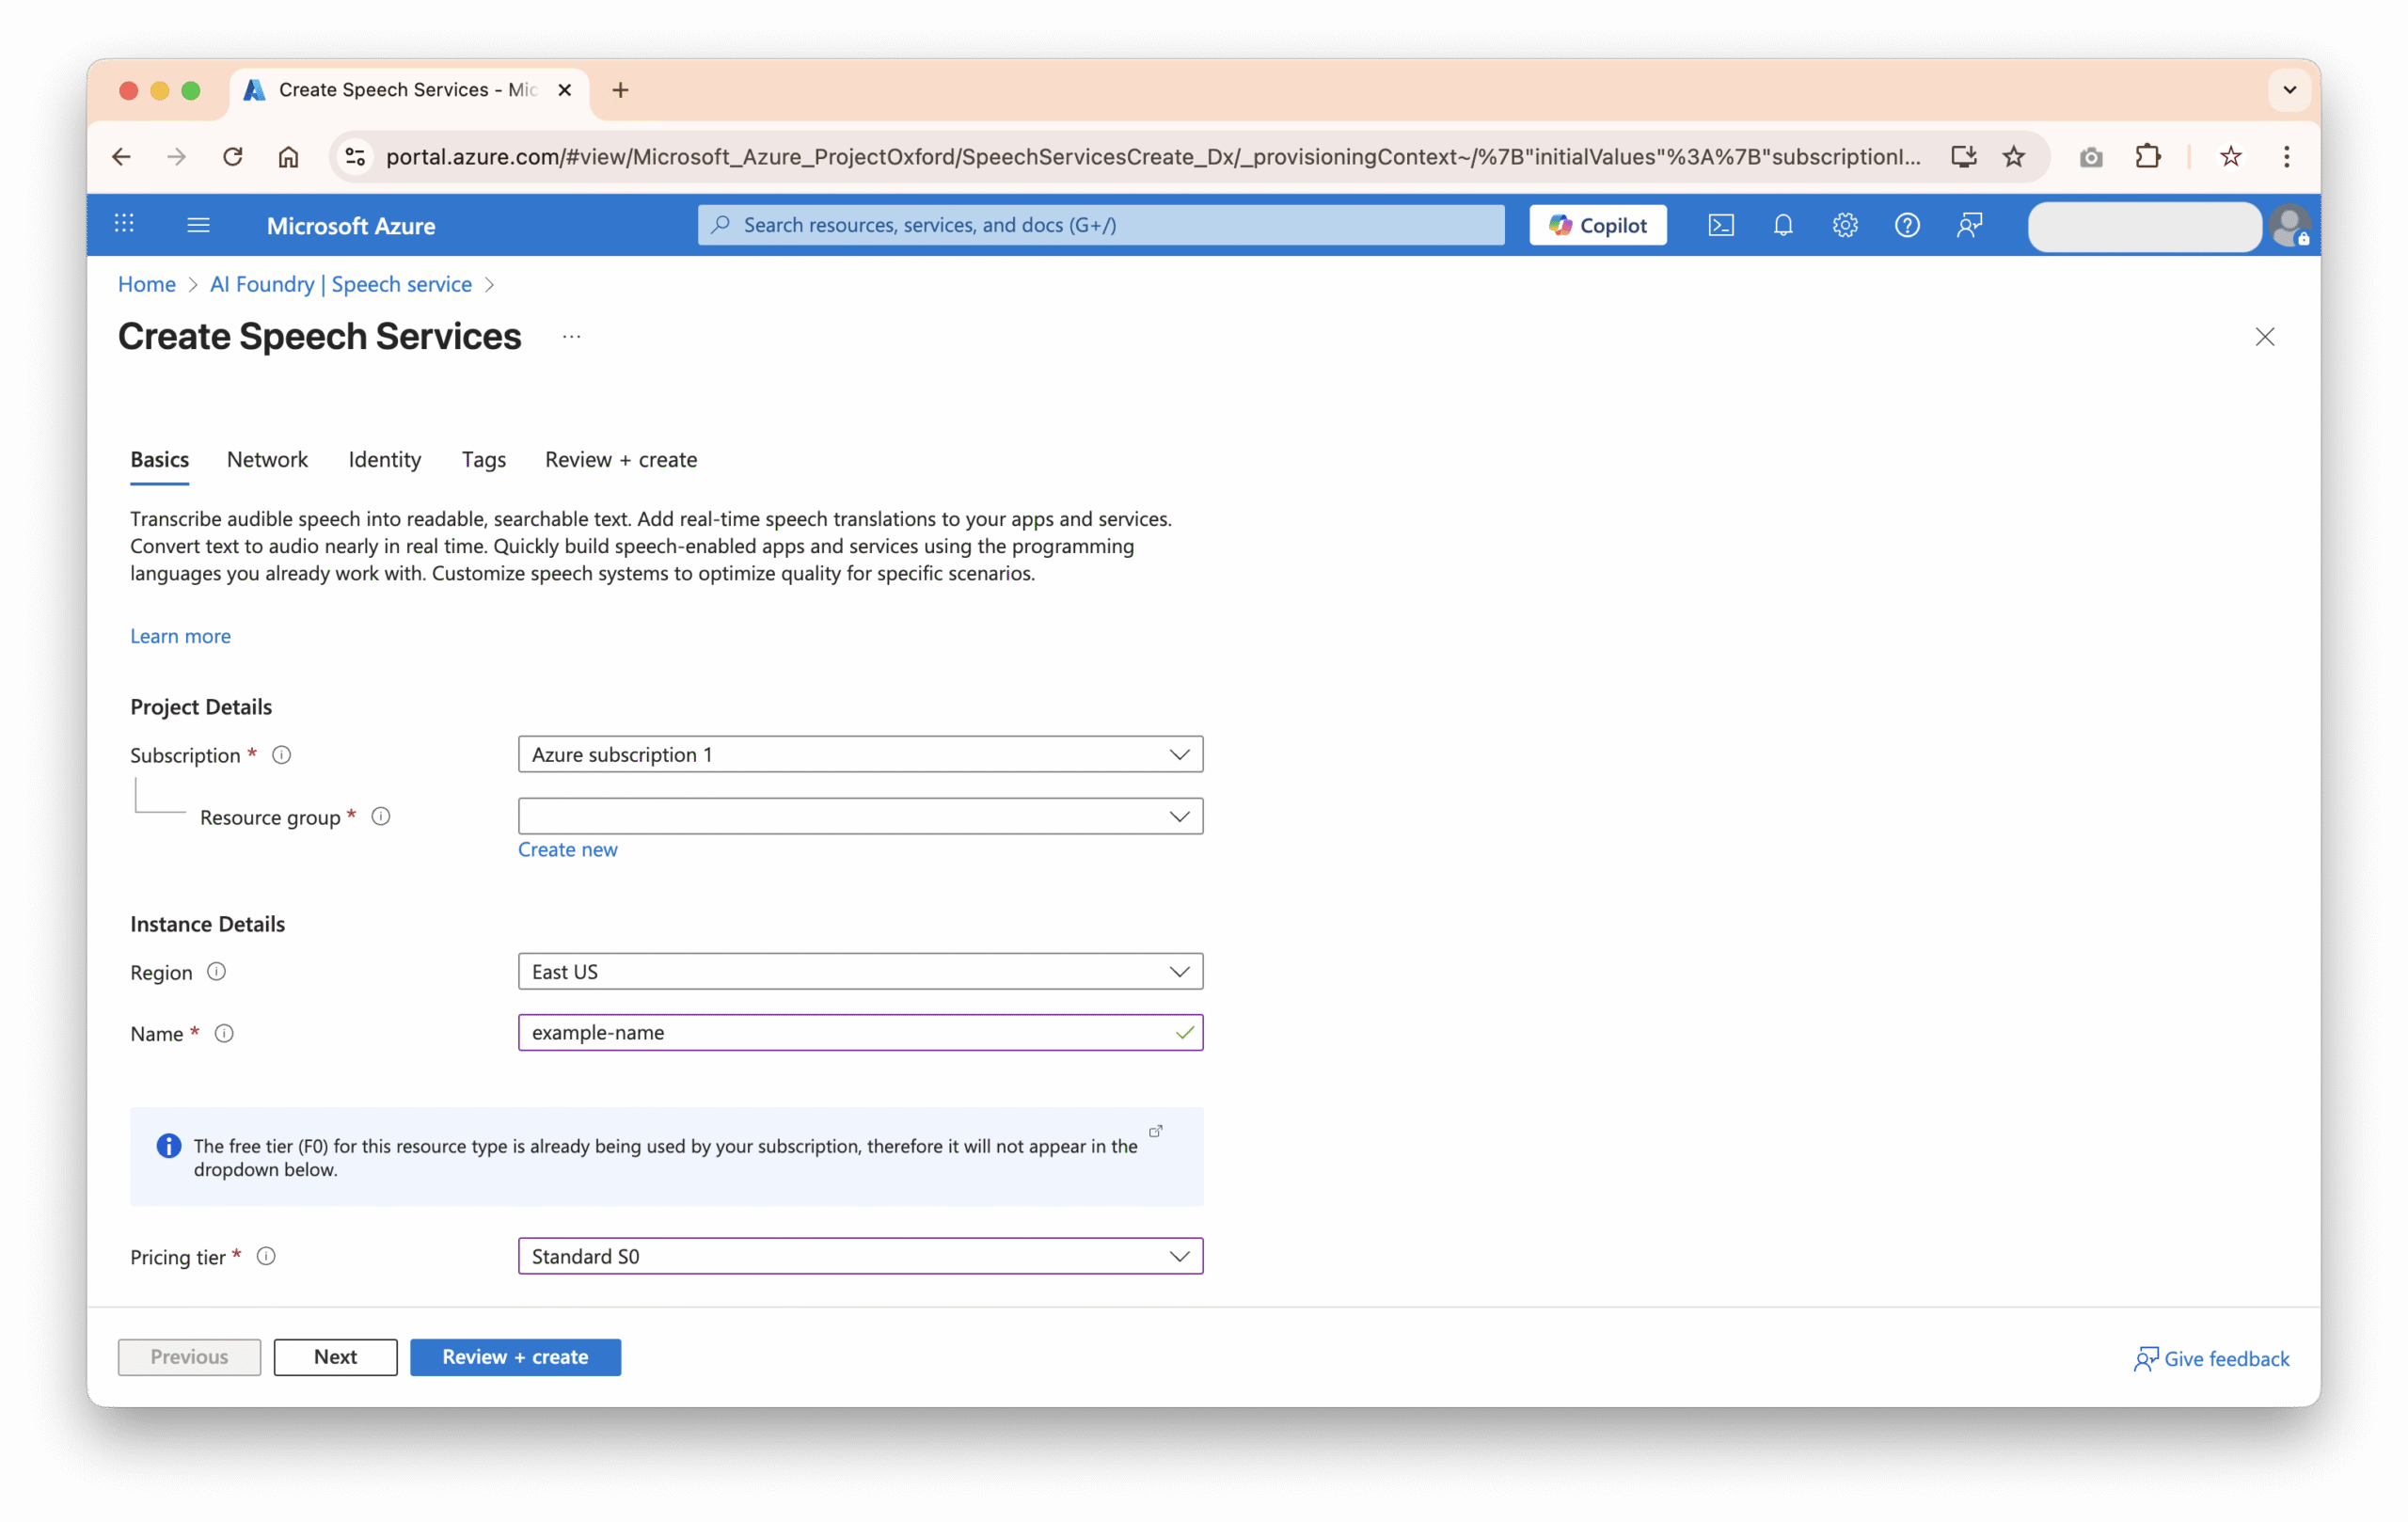
- Subscription: Choose your plan.
- Resource Group: Create or select an existing group.
- Region: Choose the closest data center to your audience.
- Name: Example:
WordPress-TTS.
4. Click Review + Create, then Create.
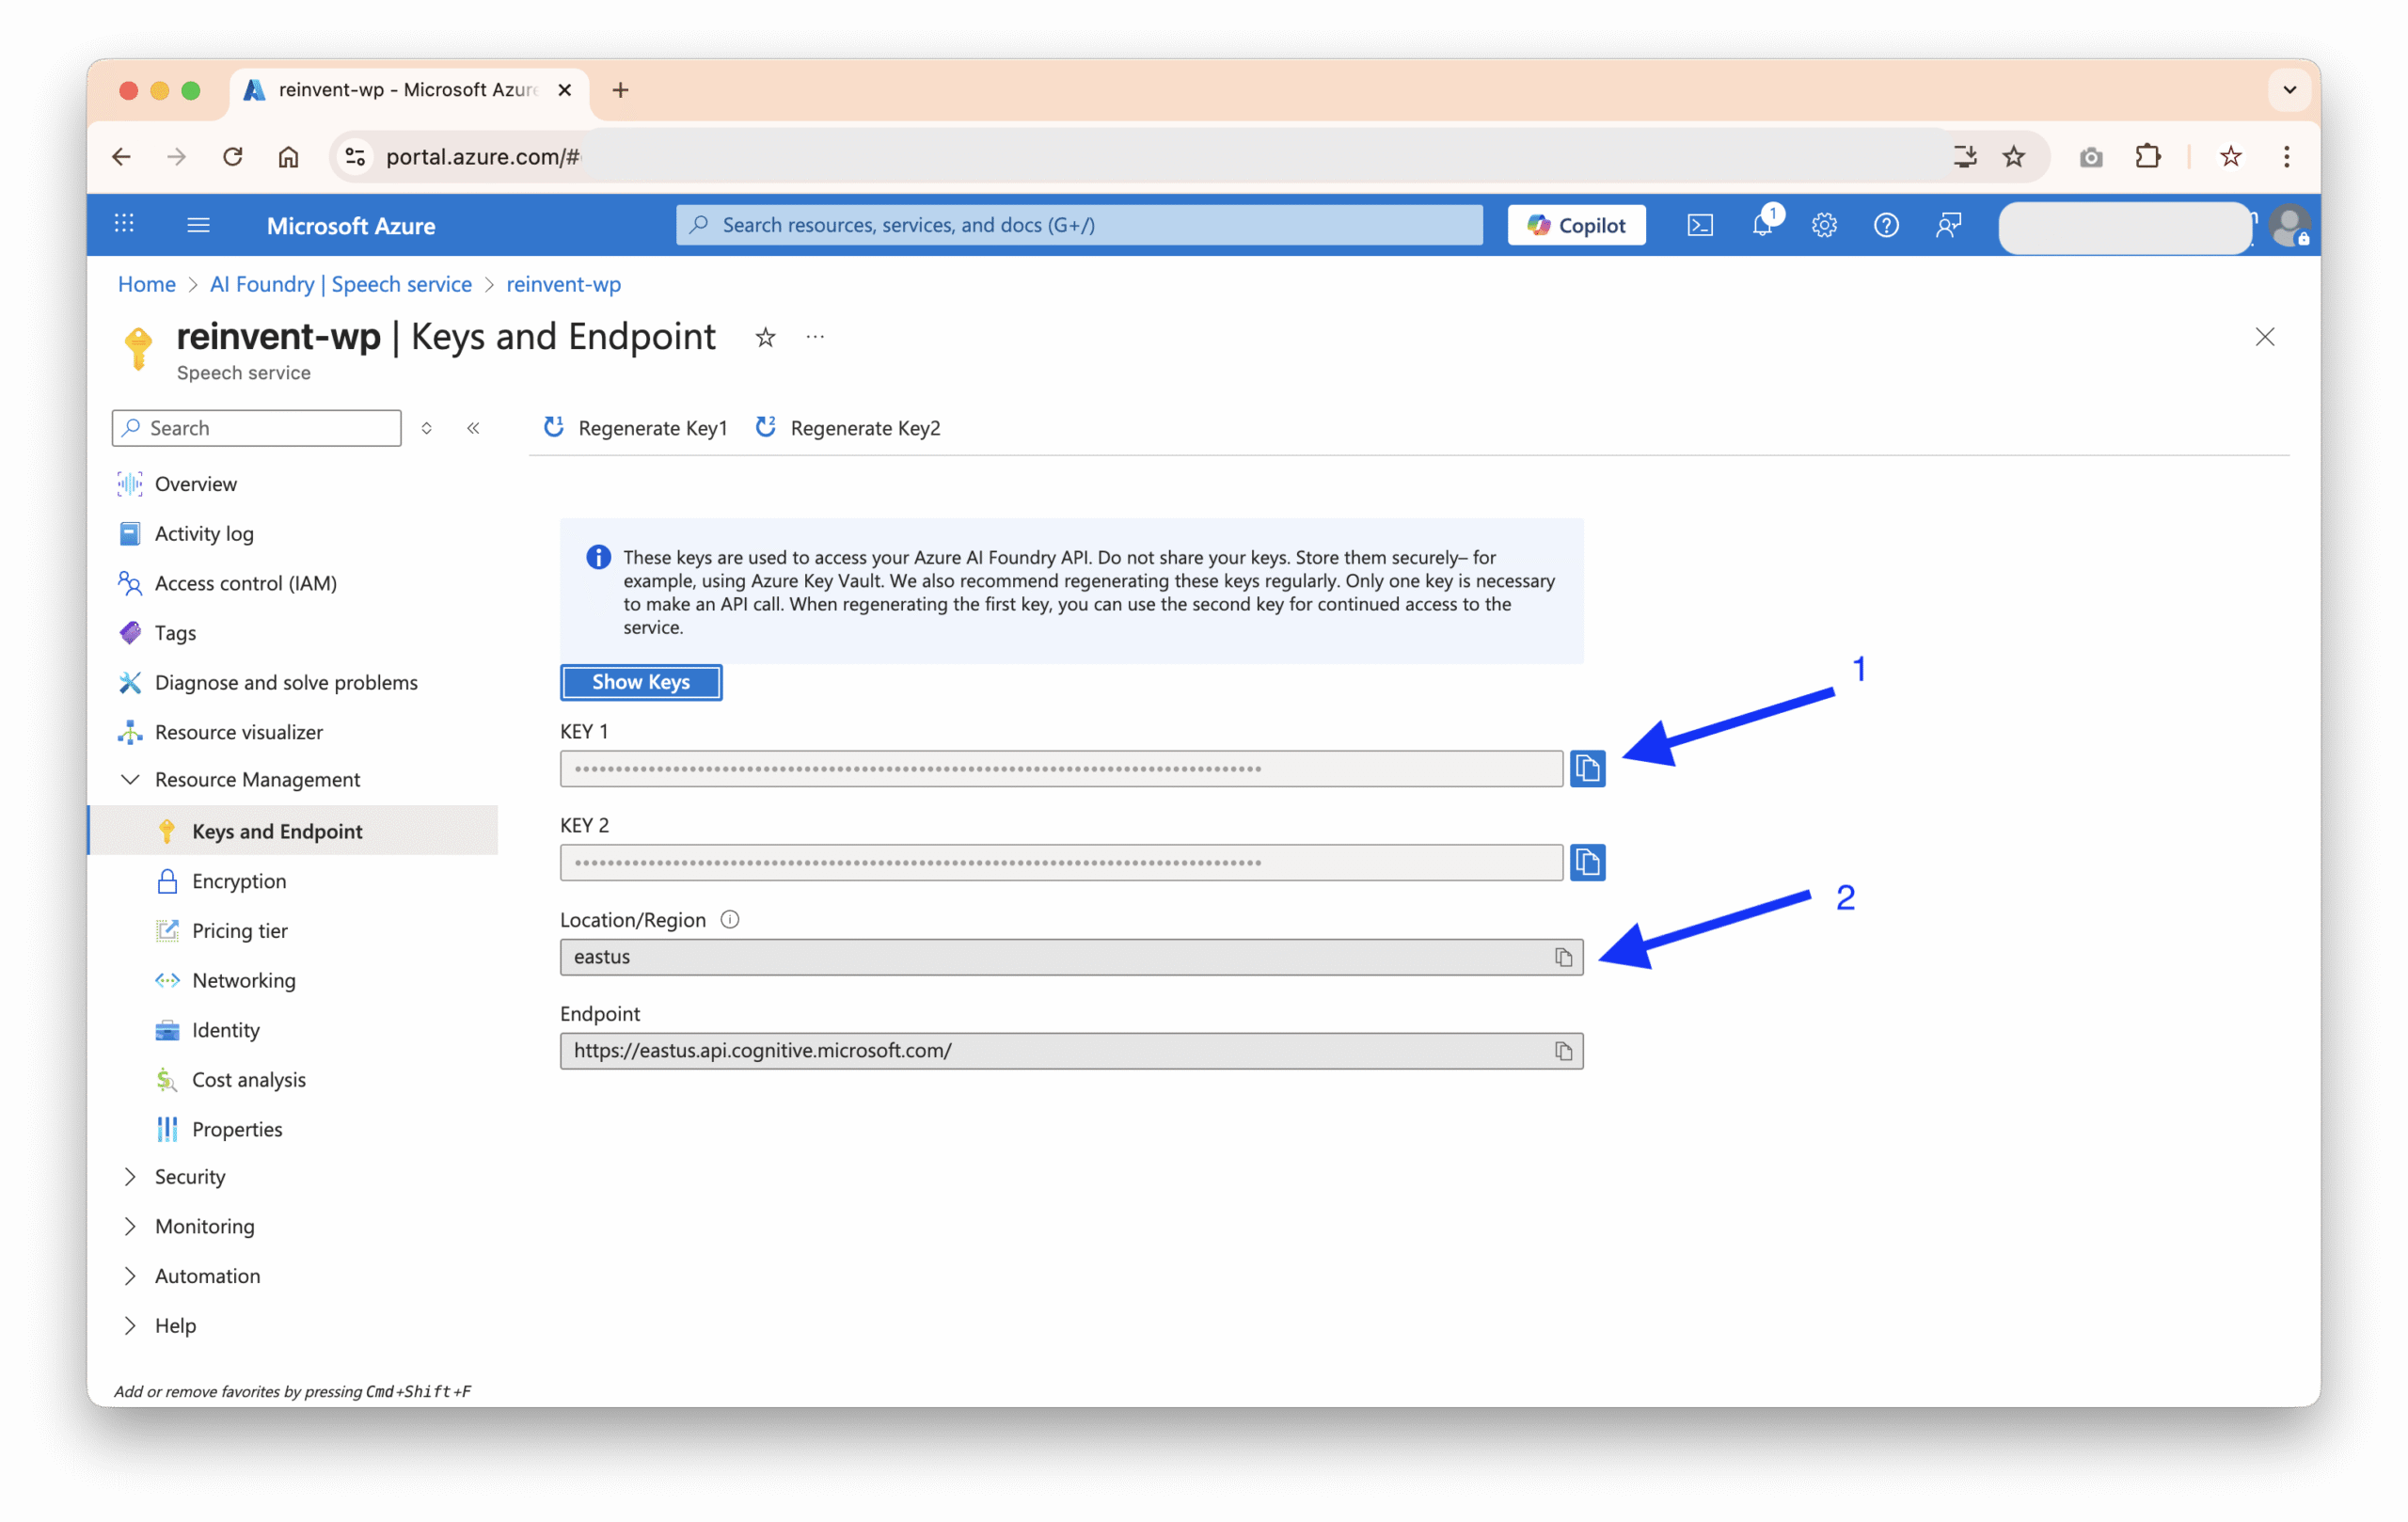
Step 5: Get Your Azure API Key and Endpoint
- Once the resource is created, open it from your dashboard.
- Go to Resource management > Keys and Endpoint under the left-hand menu.
- Copy:
- Key 1 or Key 2 (either will work).
- Endpoint URL (e.g.,
https://eastus.api.cognitive.microsoft.com/).
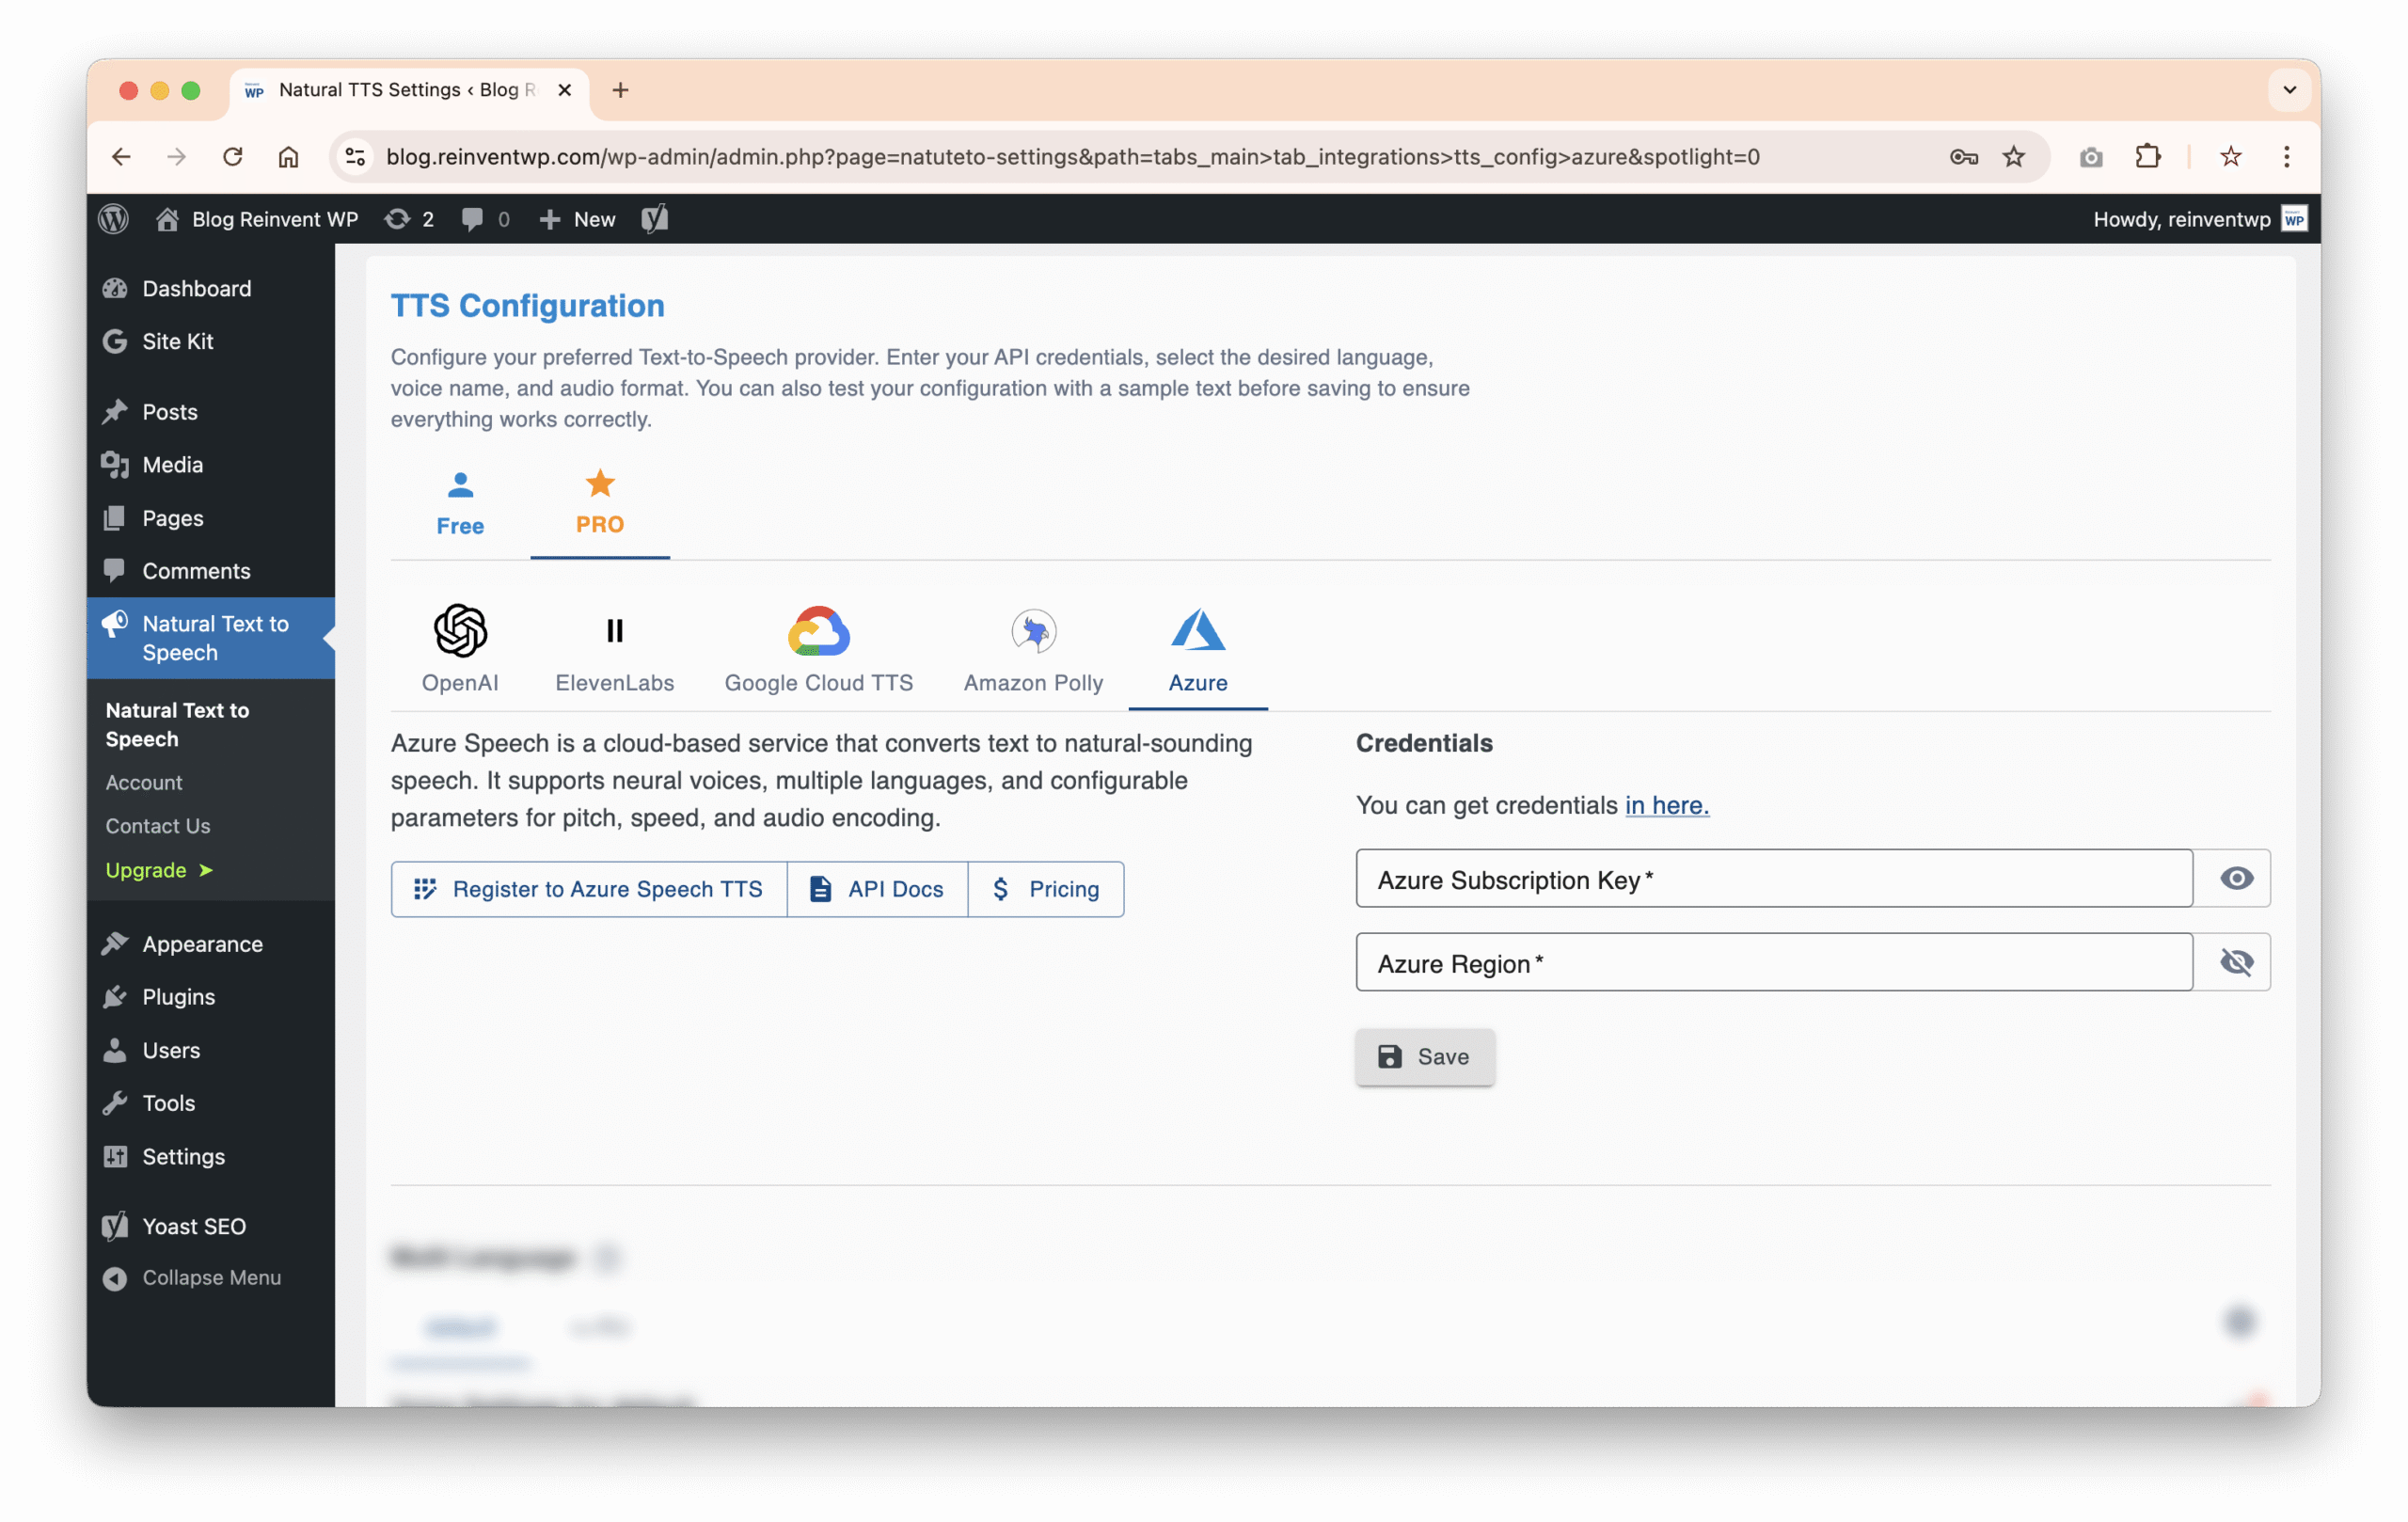
Step 6: Configure the Reinvent WP Text to Speech Plugin
- In WordPress, go to Settings → Reinvent WP Text to Speech.
- Select Azure as your TTS provider.
- Paste your Azure Service Key and Azure Region into the appropriate fields.
- Save changes.
Step 7: Customize Voice Settings
Azure offers a wide range of neural voices and customization options.
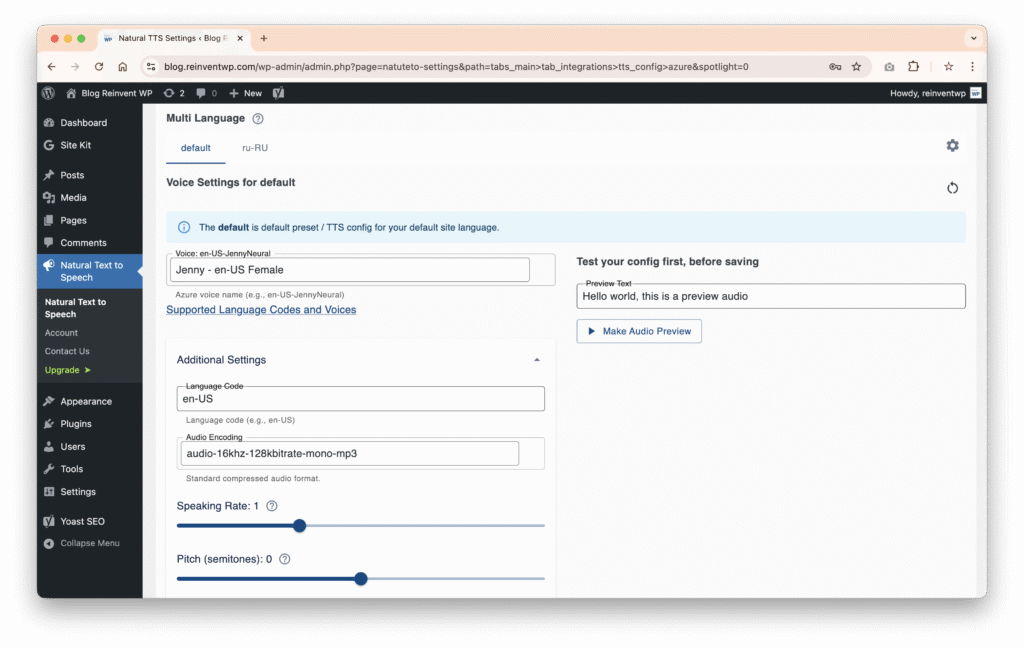
- Language: Select from over 100 languages and dialects.
- Voice Style: Choose between standard and neural voices.
- Adjust speed and pitch for the perfect delivery.
- Use SSML for advanced control like:
- Adding pauses.
- Emphasizing words.
- Fine-tuning pronunciation.
Step 8: Configure Button Placement
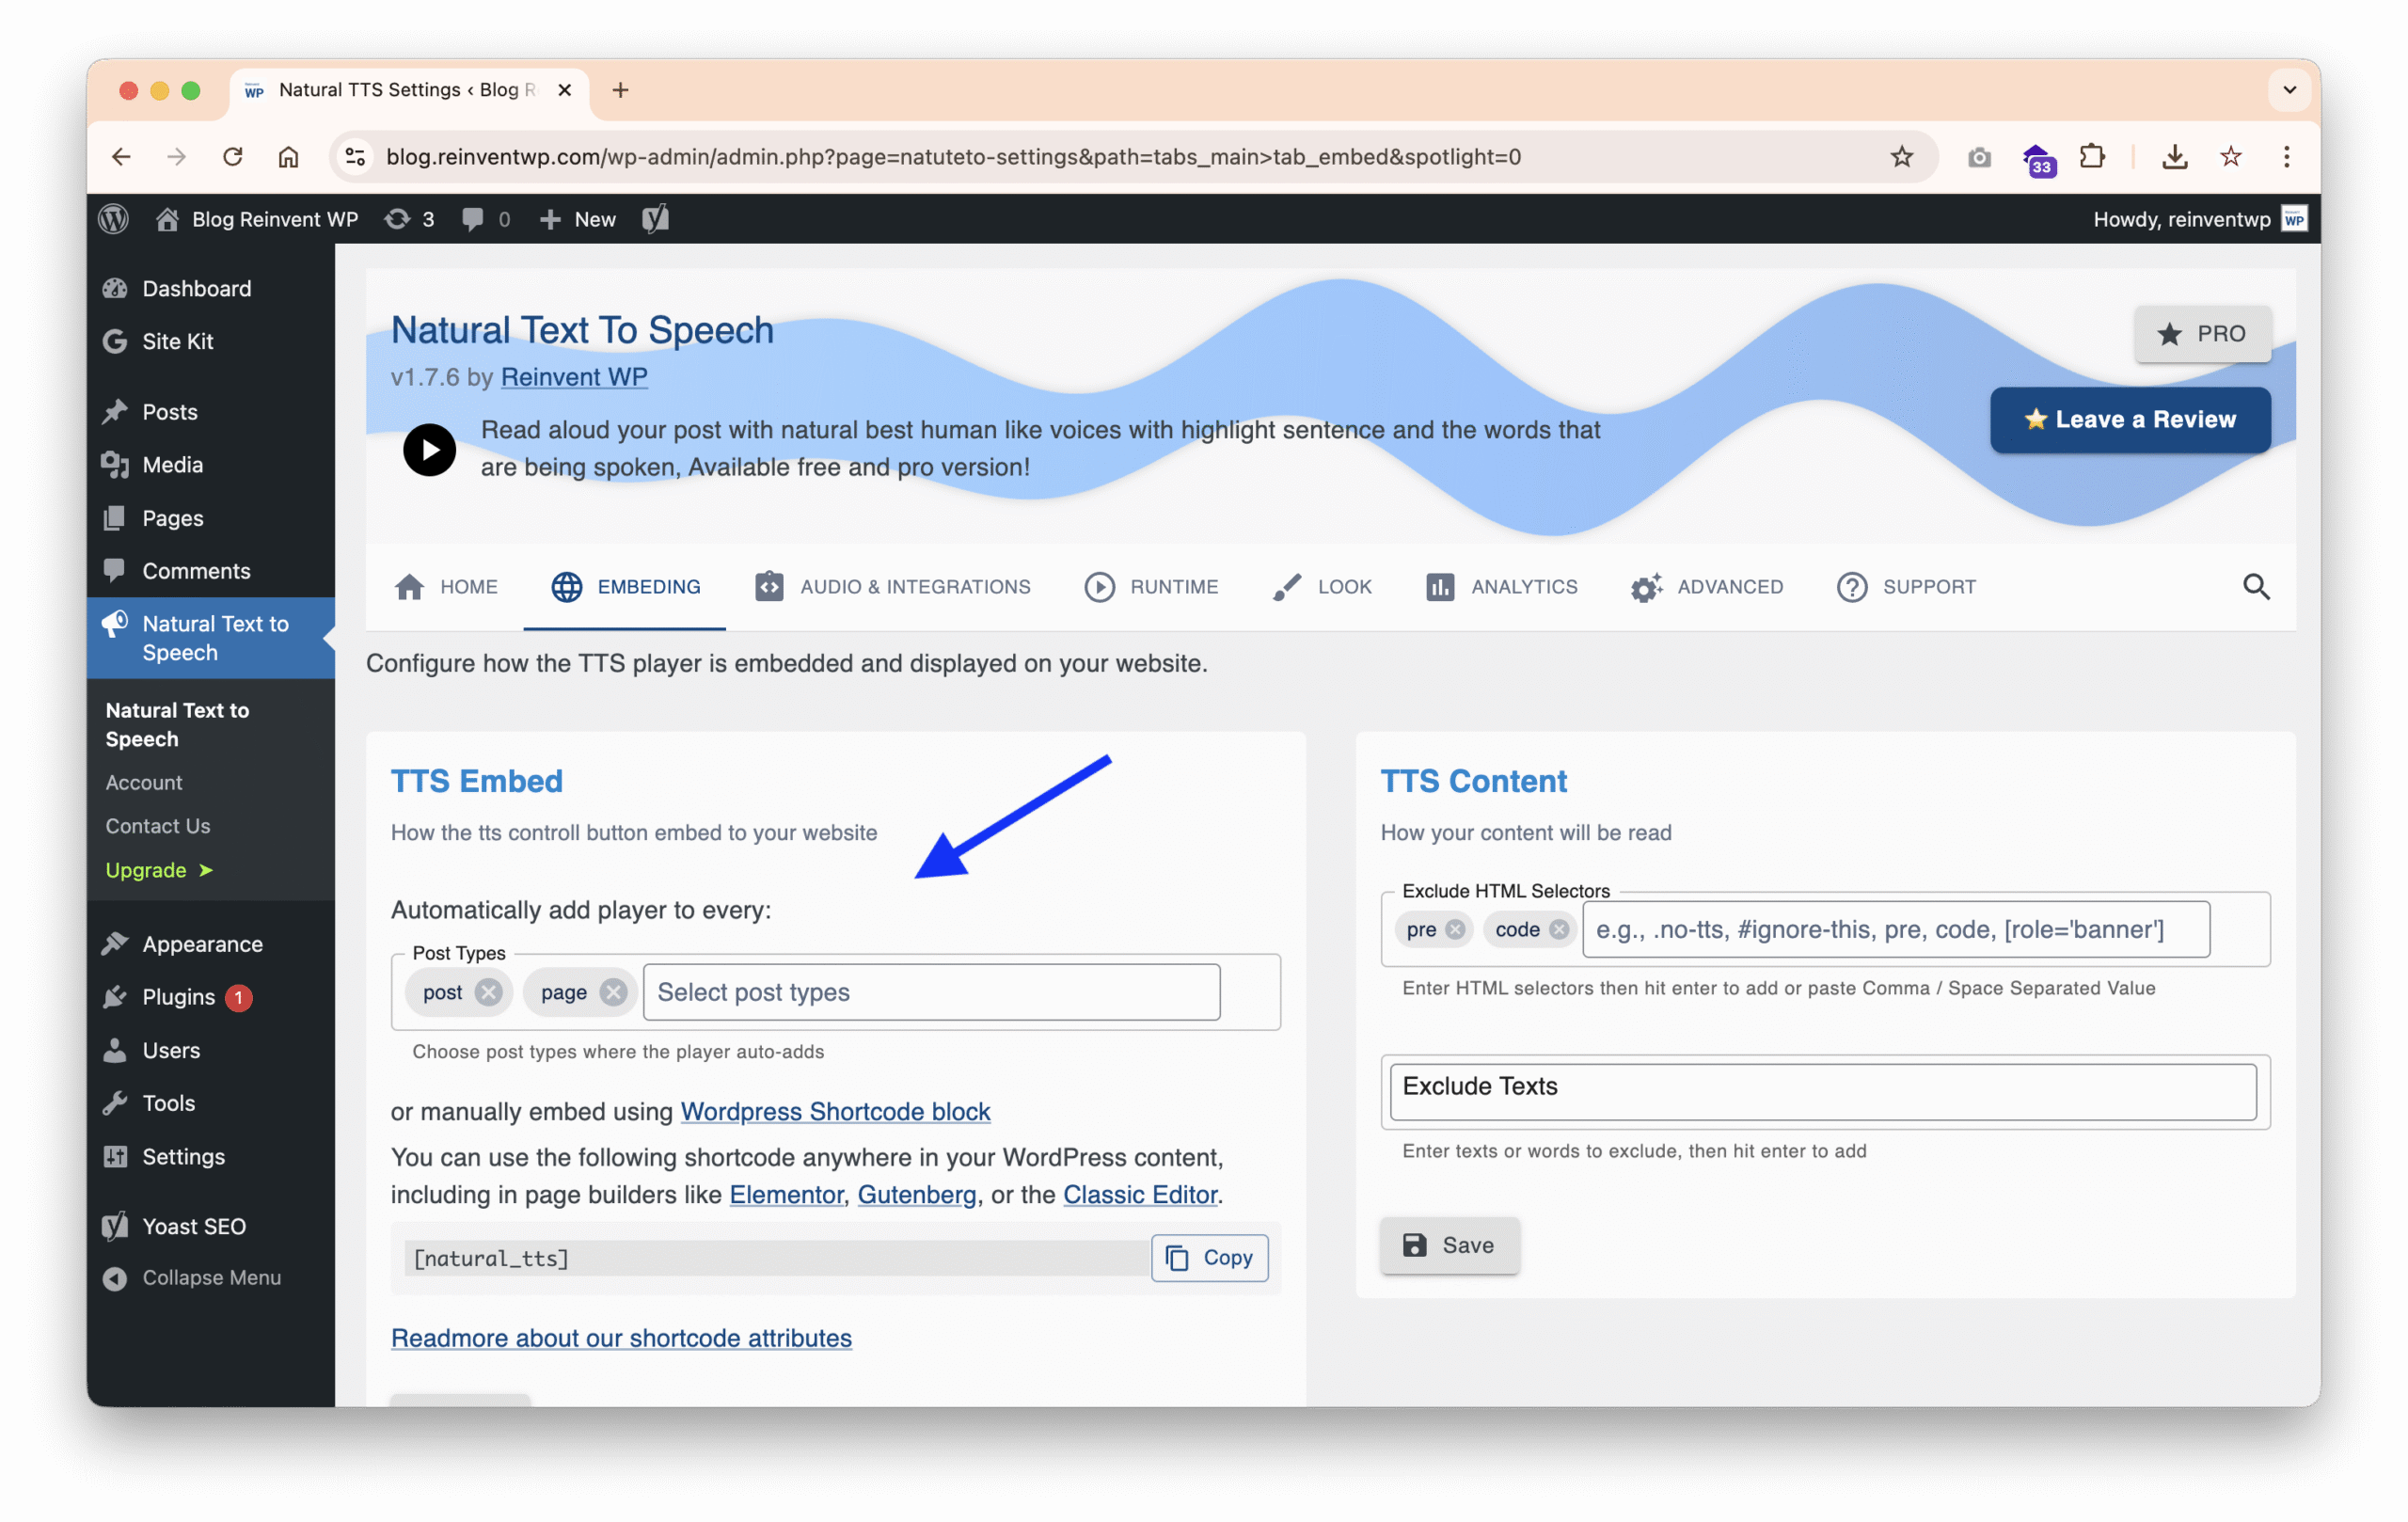
Choose how the “Listen” button will appear on your site:
- Automatic Placement: Show it above or below every post or page.
- Manual Placement: Insert the shortcode directly in your content.
Step 9: Save & Test
- Save your settings in the plugin.
- Open any post or page on your site.
- Make sure the “Listen” button appears and plays the content properly.
- Test on both desktop and mobile for compatibility.
Final Thoughts
Integrating Microsoft Azure Text-to-Speech with your WordPress site using the Reinvent WP Text to Speech plugin is a powerful way to make your content more accessible, engaging, and interactive.
Whether you’re running a blog, online course, or corporate site, this setup helps you provide a modern, inclusive experience for your audience.
By combining Azure’s realistic neural voices with Reinvent WP Text to Speech’s simple interface, you can deliver professional-grade audio directly on your WordPress site.